• טרי
תוספות חוט 50 יחידות, תוספות אגוז הפחתת נקבה זכר, חוט מ-10 על 1.25, תוספות לתיקון בורג,

תוספות חוט 50 יחידות, תוספות אגוז הפחתת נקבה זכר, חוט מ-10 על 1.25, תוספות לתיקון בורג,

ILS 1.67

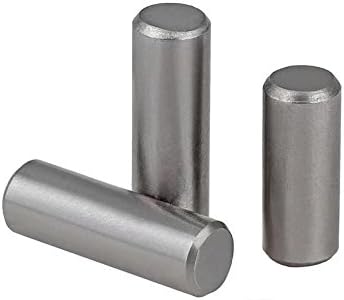
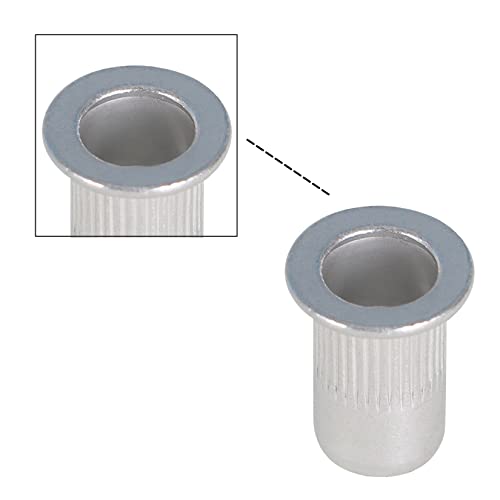
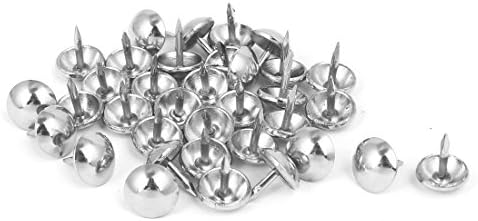
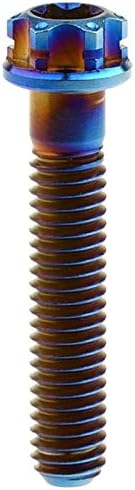
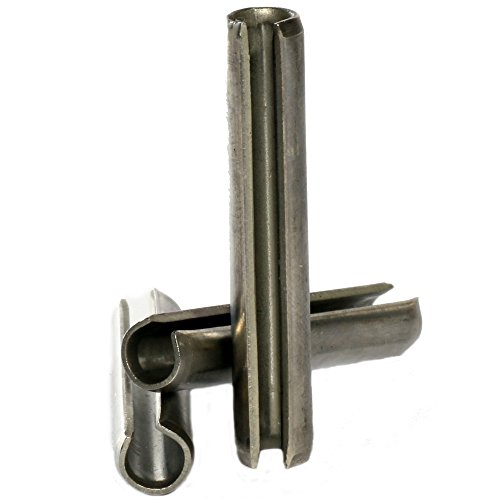
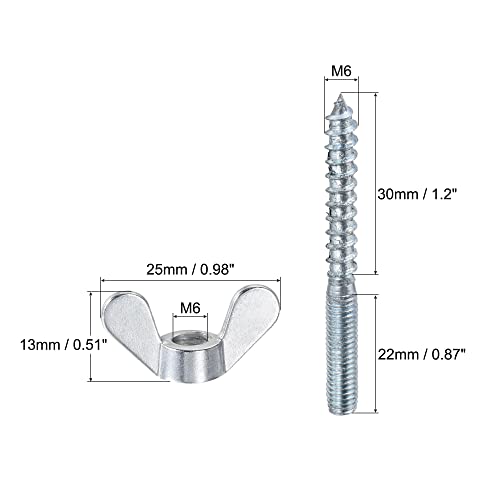
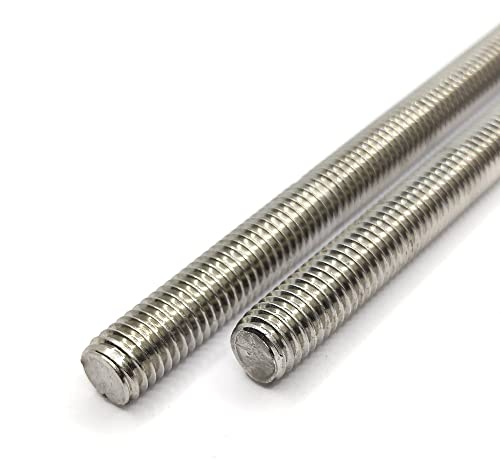
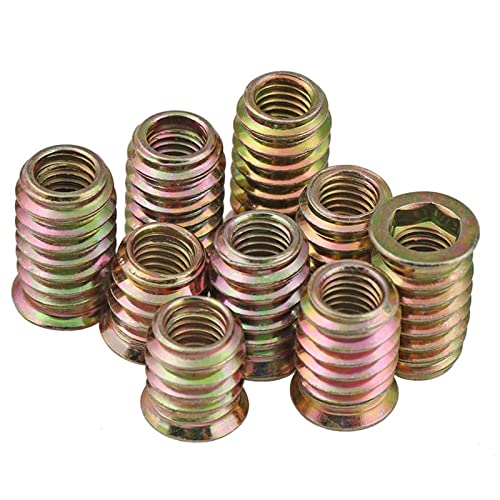
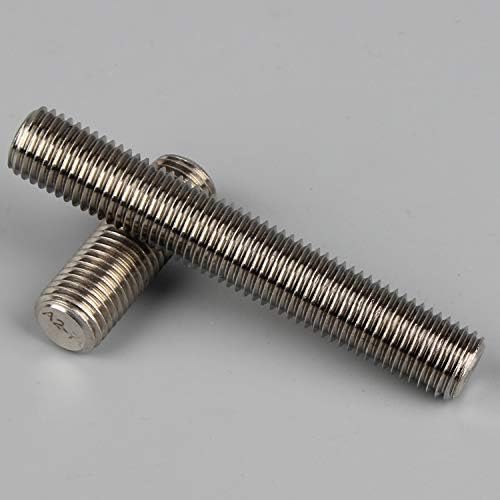
אתה יכול לתקן את חור ההברגה בצורה חסכונית כאשר מתרחשת שגיאת חוט או תיקון חור הברגה נשי פגום הוספת הברגה יכולה לשמש כשיטת תיקון. חוט מוסיף יכול עובד להמרה בין ו אינץ חוט חורים, מאוד נוח ומהיר. חוזק גבוה, גבוהה-דיוק יהלום בצורת חתך פלדת חוט משמש. תוספות חוט חוט נקראות גם נדן הברגה, שרוולי הברגה מנירוסטה, שרוולי חוט, שהוא סוג חדש של מחברים עם הברגה נשית. לשפר באופן משמעותי חוט חוזק וללבוש התנגדות כאשר מיושם כדי נמוך-חוזק הנדסת חומרים כגון אלומיניום סגסוגת, אבץ סגסוגת, סגסוגת, נחושת, פלסטיק, הנדסת פלסטיקה, וכו'. כאשר אתה מתאים את חוט בורג סט בורג חור של לחומר של אלומיניום סגסוגת וחומרים אחרים יכול ליצור חוזק גבוה, ללבוש עמיד, גבוהה‑דיוק סטנדרטי נקבה חוט. מפרט : סוג פריט : תוספות חוט חומר : סוס304דגם : מ '10איקס 1.25חוט מפרט : מ' 10איקס 1.25 (מ מ)מספר סיבוב : 13.3 סיבובים קוטר חיצוני לפני ההתקנה : בערך.6 בקוטר של קידוח מקדח להתקנה : כ.5 ד/3 ד : אורך לאחר ההתקנה : כ.8 ב-25 מ מ / 1 ב-30 מ מ / 1.2 ב-חוט מגן שרוול דגם מפרט תיאור : לדוגמה : מ '3איקס 0.5 ד, כלומר לאחר השלמת ערכת הבורג, החוט הנשי הוא מ' 3, המגרש הוא 0.5 ד (אורך מתייחס 1.5 פעמים הקוטר, כלומר, 1.5 מ מ אורך כאן מתייחס אורך לאחר התקנה. קידוחהשתמש במקדח בגודל המופיע בטבלת הפרמטרים של הכנס חוט החוט כדי לקדוח את החור. היזהר לא לקדוח את החור לצורת חרוט. יש לפוצץ את השבבים הנוצרים מחור המקדחה באוויר דחוס. לאחר הקידוח, הקידוח הנגדי לא יעלה על עומק 0. קידוח נגד גדול מדי אינו תורם להברגה של הכנסת חוט החוט. הקשהלהשתמש בברזים מיוחדים עבור הוספת חוט חוט כדי להקיש. עומק ההקשה חייב לחרוג מאורך ההתקנה של מוסיף החוט. לאחר ההקשה, השתמש בתרסיס אוויר דחוס כדי לפוצץ את הפסולת. כאשר דיוק החוט הוא גבוה, לבדוק את החור התחתון טפח עם מד תקע חור תחתון מיוחד עבור מוסיף חוט חוט.

מפרטים מפורטים

Item Type:
Thread Inserts
Material:
SUS304
Model:
M10x1.25
Thread Specification:
M10x1.25 (mm)
Turn Number:
13.3 turns
Outside Diameter Before Installation:
Approx. 12 ~ 15.5mm / 0.5 ~ 0.6in
Diameter of Drilling Drill Bit for Installation:
Approx. 10.3mm / 0.4in
1D/1.5D/2D/2.5D/3D:
Length After Installation:
Approx. 10mm / 0.4in
15mm / 0.6in:
20mm / 0.8in:
25mm / 1in:
30mm / 1.2in:
Thread Protective Sleeve Model Specification Description:
For Example
1. Drilling:
Use the drill bit of the size listed in the parameter table of the wire thread insert to drill the hole. Be careful not to drill the hole into a cone shape. The chips generated by the drill hole must be blown out with compressed air. After drilling, the counterbore should not exceed the depth of 0.4 pitch. Too large counterbore is not conducive to the screwing of the wire thread insert.:
2. Tapping:
Use special taps for wire thread inserts to tap. The depth of the tapping must exceed the installation length of the thread inserts. After tapping, use a compressed air spray  to blow out the debris. When the thread accuracy is high, check the tapped bottom hole with a special bottom hole plug gauge for wire thread inserts.:
3. Installation:
Put the wire screw sleeve into the installation wrench (figure 5 on the right), insert the wire screw sleeve installation tail handle into the guide rod groove of the installation wrench, and turn the handle of the installation wrench to screw the wire screw sleeve into the screw hole. For installation of M14x2 or more phase thread thread inserts, you can use the T type slotting simple tool to install; Note:
During the installation and screwing process of the thread inserts, there should be no pressing in the vertical direction to prevent jumping teeth. The correct method is slowly screw in the direction of thread rotation.
4. Remove the handle (break off the mounting handle):
Use a breaker to break the mounting handle. Use about 200g of coconut to hit the breaker instantly, and the handle can be removed. Do not use the mounting wrench to rotate in the opposite direction. Do not break the mounting handle. This situation is very easy. As a result, the tail shank was broken and the wire was pulled out.:
5. Unscrew:
When installation problems occur during the installation of the wire thread insert (such as jumping teeth), the thread insert needs to be removed, and a special sleeve remover should be used to remove the wire thread insert. :
Package List:
50 x Thread Inserts:

תוספות מוצרים